Augmented Sound software
Augmented sound uses 2 softwares-aplications.
Supecollider is used for dealing with sound and Openframeworks is used for dealing with the visual part and the laser tracking.
Here you can download the code used in Openframeworks:
Augmented Sound Software Openframeworks
and here the one used in Supercollider:
Augmented Sound Software Supercollider
The code is mainly taken from the one made by Theodore Watson and Zachary Lieberman for the Laser tag project: Laser tag 2.0. Specially the code referred to the laser tracking part and the settings configuration for dealing with HSV.
The Openframeworks software is divided in two screens-windows. The first screen is the one that is used to configure the whole application and the second screen is the one that is projected and the one that the user interacts with.
First screen: Configuration Screen

It is divided in 5 sections.
1. Shortcuts
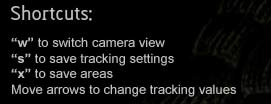
The first section called shortcuts, show us what keys of the keyboard have special actions:
“w” key switches between the camera view and the laser tracking view.
“s” key is used to save the laser tracking configuration, that means to save the HSV values and the warp adjustments.
“x” key is used to save the areas (we will talk later about the areas)
“arrow keys” are used to navigate throught the HSV values to change them.
“d” key is used to delete areas (for doing that, point with the laser to one area and press “d”).
“m” key is used to move areas (for doing so, point with the laser to one area, press m and move the laser (kind of clic and drag)).
2. General Settings
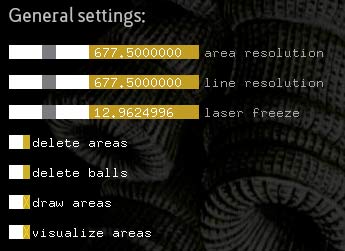
This is used to change some general configuration settings.
“Area resolution” is used to increase or decrease the number of points of the area. When there is an organic shape, for instance a leaf, we would want to increase the resolution (that will give us more points), but when there is a less organic shape, for instance a square, we want to decrease the resolution = less points.
“Line resolution” is used just to make the line look better when we are creating the shapes. It is not really important.
“Laser freeze” is used to keep the pointer of the laser on screen. Sometimes the laser tracking is not good, because of the light conditions, or because our laser is getting out of batteries. If the laser freeze is increased, the position of the laser freezes so it is not missed.
“delete areas” is a button that deletes the areas when it is pressed.
“delete balls” is a button that deletes the balls when it is pressed.
“draw areas” is a switch-toggle button that allowe drawing areas during the configuration stage.
“visualize areas” is a switch-toggle button that allowes to visualize the areas and change their shape.
3. Tracking configuration
![]()
Here is where we change the HSV values for tracking the laser. Moving the arrow keys up, down, left and right these values can be changed. Moreover here can be visualized the x an y coordinates of the warp rectangle of the right.
4. Setting up camera view:
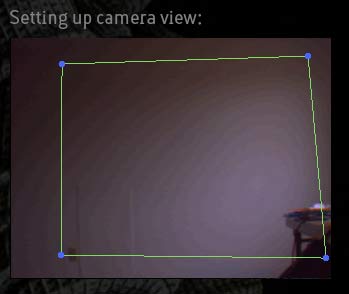
Here is where the camera frame is warped. To change warping rectangle it is necessary to drag using the mouse the four points that are located on each one of the corners of the square.
5. Visualizing laser tracking:
![]()
Here is where we visualize the laser. It is possible to switch between the camera view and the tracking view by pressing the “w” key.
Second Screen: Projection Screen
This Screen is devided in 2 big sections.
The first one is a GUI where the user can choose different kinds of balls. Depending of the combination of these balls, there will be differents behaviours that will produce different sounds.
The second one is where the areas are located, inside these areas the balls are created and due to the interaction between balls and areas, sound is generated.
The GUI is composed by:
Colored Balls:

There are 4 balls that have different color. Each of these balls have a different sound.
Delete Balls:
![]()
Selecting deleting balls, the user can delete balls by doing a square selection using the laser.
Collision Ball:

If collision ball is selected, the new balls that are created collide with other collision balls. A sound is produced each time a collision happens.
Mass Ball:
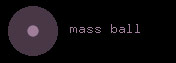
If Mass Ball is selected, the new balls will change their size while they are created. Depending of the size of the ball they have more or less mass. If they have more mass they are stronger if there is a collision, and the volume of theis sound is also higher.
Friction Ball:
If Friction Ball is selected, the new balls a friction force is applied to the ball. That means that their speed is not constant and it decreases over time.
Depending of the speed and the location of the ball, the sound of the ball is modify as can be seen on this figure:
To see how the area”s set up works, you can see this video:
It is necessary to click the “draw areas” button first.